


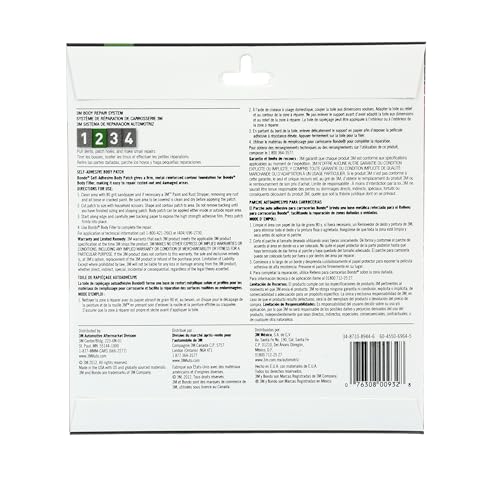

Bondo Self Adhesive Body Patch
We engineered the Bondo Self Adhesive Body Patch to simplify rust and hole repair on automotive bodies, metal panels, and fiberglass surfaces. This adhesive-backed fiberglass mesh eliminates the need for mixing separate resins or cutting custom shapes, delivering professional-grade reinforcement in a ready-to-use format.
The self-adhesive backing bonds directly to clean, prepared metal and fiberglass, creating a strong foundation for body filler application. Whether you're repairing rust-through on rocker panels, patching small holes in fenders, or reinforcing cracked fiberglass, our patch provides the structural support required for lasting repairs. Once applied and covered with body filler, the patch is ready to sand and paint within hours, helping you complete automotive restoration projects faster without compromising quality.
Patch specifications & repair coverage
Fiberglass Mesh Construction & Adhesive System
The bondo self adhesive body patch uses woven fiberglass strands that create a high-strength reinforcement layer across damaged areas. Our fiberglass mesh construction distributes stress evenly across the repair zone, preventing cracks from reappearing through body filler.
The pressure-sensitive adhesive backing activates on contact with clean metal or fiberglass surfaces. Unlike traditional patches that require separate resin application, our adhesive system eliminates mixing steps and reduces application time. The adhesive cures to form a mechanical bond with the substrate while the fiberglass mesh embeds into body filler, creating a composite repair structure.
Application Process & Repair Coverage
Each 4-inch x 4-inch patch covers up to 16 square inches of damaged area, suitable for rust-through spots, small collision holes, and cracked fiberglass sections. For larger repairs, you can overlap multiple patches with a 1-inch overlap between adjacent pieces.
Start by grinding away rust or damaged material until you reach solid metal or fiberglass. Clean the area thoroughly, then peel the backing from the patch and press firmly onto the prepared surface. Smooth from the center outward to eliminate air bubbles, ensuring full contact between the adhesive and substrate.
Dimensional Specifications & Custom Sizing
The standard 4-inch x 4-inch format addresses the most common automotive rust and hole repair scenarios. This size provides adequate overlap around damage while minimizing excess material waste. The mesh thickness measures approximately 0.020 inches, thin enough to feather smoothly under body filler yet robust enough to provide structural reinforcement.
You can trim the patch to custom dimensions using household scissors or a utility knife. For repairs smaller than the full 4-inch square, cut the patch 1 to 2 inches larger than the damaged area on all sides. This overlap ensures the patch extends onto solid substrate, distributing load beyond the compromised zone.
Complete Your Auto Body Repair


Rated 4.8 by verified buyers
Self Adhesive Body Patch Questions
No, you must remove all rust and corrosion before applying the patch. The adhesive backing requires clean, solid metal or fiberglass to create a proper bond.
Grind or sand until you reach shiny bare metal with no rust pitting. Any rust left under the patch will continue to spread, eventually causing the repair to fail. Clean the area with wax and grease remover after grinding to ensure maximum adhesion.
Most repairs require two to three layers of body filler to fully embed the mesh and build the surface to the correct contour. Apply the first layer to saturate the fiberglass weave, working filler through the mesh with firm spreader pressure.
Allow that layer to cure, then apply additional filler to build up the repair area flush with surrounding panels. Each layer should be no thicker than 1/4 inch to prevent cracking during cure. Sand between layers with 80-grit paper to ensure good adhesion between applications.
No, this patch is designed for metal and fiberglass substrates only. Plastic bumper covers flex during impacts, and the rigid fiberglass mesh would crack under normal bumper movement.
For plastic bumper repair, use dedicated flexible plastic repair kits with adhesion promoters formulated for automotive thermoplastics. The fiberglass mesh in this patch cannot accommodate the flex characteristics of polypropylene or polyurethane bumper materials.
Yes, you can trim the patch to any size with household scissors or a utility knife. Cut pieces 1 to 2 inches larger than the damaged area to ensure adequate overlap onto solid substrate.
The adhesive backing and fiberglass mesh maintain their properties when cut to custom dimensions. Many technicians cut a single patch into two or three smaller pieces for multiple pinhole rust repairs on the same panel, maximizing material use and reducing waste.
Wait time depends on ambient temperature and the specific body filler product you use. Most polyester body fillers cure in 20 to 30 minutes at 70°F, becoming hard enough to sand without gumming.
The patch itself does not affect cure time — follow the filler manufacturer's instructions for working and curing times. In cooler temperatures below 60°F, allow additional time for complete cure before sanding. The filler should feel rock-hard and produce dust rather than strings when sanded.
The 4-inch x 4-inch patch can span holes up to approximately 2 inches in diameter while maintaining 1 inch of overlap on all sides. For holes larger than 2 inches, use multiple overlapping patches or consider backing the area with sheet metal before patching.
Very large holes (over 3 inches) may require structural reinforcement beyond what fiberglass mesh provides. In these cases, weld in a metal patch panel, then use the self-adhesive patch to bridge gaps and smooth transitions between the welded patch and original metal.
No special primers are needed. Once you've sanded the body filler smooth and feathered the repair edges, apply standard automotive primer-surfacer directly over the repair.
The fiberglass mesh remains completely embedded in the filler and does not require sealing or special treatment. Use the same primer you would apply to any body filler repair, following the primer manufacturer's instructions for application thickness and drying time before topcoat application.