

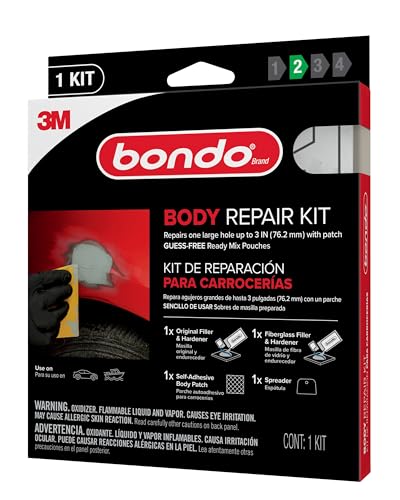


Bondo Repair Kit
Our Bondo Body Repair Kit delivers everything you need for professional automotive body repair in one convenient package. Trusted by body shops and DIYers for over 60 years, this complete system includes our legendary two-part polyester filler, cream hardener, and precision application tools.
Whether you're fixing dents, filling rust damage, or smoothing body panels, this kit provides strong, sandable repairs that bond permanently to metal, fiberglass, and wood. The formula spreads easily, cures quickly, and accepts paint, primer, and clear coat without cracking or shrinking.
What's included in this professional kit
Two-Part Polyester Formula & Application
The Bondo repair kit uses a two-part polyester resin system that hardens through a chemical reaction between the filler and cream hardener. Mix a golf-ball-sized portion of filler with a 1-inch ribbon of hardener on a clean surface, stirring thoroughly until the color is uniform with no streaks.
Apply the mixed compound immediately using the included plastic spreader, working it into the damaged area with firm, overlapping strokes. The formula remains workable for approximately 3-5 minutes at room temperature, giving you enough time to shape and smooth the repair before it begins to cure.
Surface Compatibility & Prep Requirements
This bondo repair kit bonds permanently to bare metal, aluminum, galvanized steel, fiberglass, wood, and most rigid plastics. The surface must be clean, dry, and free of rust, grease, or loose paint for proper adhesion.
For metal repairs, sand the area with 80-grit sandpaper to expose bare metal and create a mechanical bond. Remove all rust with a wire brush or grinding wheel, then wipe the surface with acetone or Bondo Surface Prep before application. Feather-edge surrounding paint at least 1 inch beyond the repair area to create a smooth transition.
Sanding, Shaping & Finishing
Once the filler reaches a cheese-like consistency (approximately 10-15 minutes), you can shape it with a Surform file or coarse rasp to rough-in the final contour. This saves time and reduces sanding dust. After full cure, begin sanding with 80-grit paper to establish the basic shape, then progress through 120-grit and 180-grit for smoothness.
The cured polyester sands easily without clogging sandpaper, producing a fine dust that indicates proper cure. Use a long sanding block for flat surfaces and contour sanding tools for curves. Check your work frequently with a straightedge or your hand to identify high and low spots.
Complete Your Auto Body Repair Workshop


Rated 4.8 by verified buyers
Common Questions About the Bondo Repair Kit
Mix approximately 1 inch of cream hardener for every golf-ball-sized portion of filler (roughly 2% hardener by volume). The mixed compound should develop a pink or red tint indicating proper catalyst ratio.
Using too much hardener causes the mixture to cure too quickly and may result in brittleness and cracking. Too little hardener extends working time but delays cure and can leave the repair soft or incompletely hardened.
No, you must remove all rust and corrosion before applying the filler. Sand or grind the damaged area down to bare, clean metal, then treat with a rust converter or etching primer.
Applying filler over rust prevents proper adhesion and allows corrosion to continue spreading underneath the repair, which will eventually cause the filler to crack and separate from the surface.
The kit bonds to bare metal, aluminum, galvanized steel, fiberglass, wood, and most rigid plastics. All surfaces must be clean, dry, and properly prepared with coarse sanding to create mechanical adhesion.
The filler will not adhere to flexible plastics like bumper covers, vinyl, rubber, or surfaces contaminated with oil, grease, or silicone. For flexible plastic repairs, use a dedicated flexible filler product designed for that material.
You can begin sanding after 15 minutes at 77°F when the filler reaches full cure. Thicker applications or cooler temperatures may require 20-30 minutes. The material is ready for primer and paint as soon as final sanding is complete.
Do not attempt to sand before the filler fully hardens, as it will clog your sandpaper and create an uneven surface. A properly cured repair produces fine powder when sanded rather than sticky residue.
Apply the filler no more than 1/4 inch thick per layer for optimal strength and cure. Thicker applications can trap heat during the exothermic curing reaction, leading to cracking, excessive shrinkage, or incomplete hardening in the center.
For deeper repairs, build up the area in multiple thin layers, allowing each to fully cure before applying the next. This produces stronger, more stable repairs than one thick application.
We stand behind every Bondo product with a satisfaction guarantee. If you're not completely satisfied with the performance of your repair kit, contact our customer service team within 30 days of purchase for a full refund or replacement.
Keep your receipt and the original packaging. Most application issues result from improper surface preparation or incorrect mixing ratios — our support team can help troubleshoot before processing a return.
Store the filler container with the lid tightly sealed in a cool, dry location below 80°F, away from direct sunlight. Keep the hardener tube capped and stored separately from the filler to prevent accidental contamination.
Properly stored, the filler remains workable for up to three years, while the hardener maintains potency for approximately 18 months. If the filler develops a strong styrene odor or the hardener becomes thick or discolored, replace it with fresh material.