
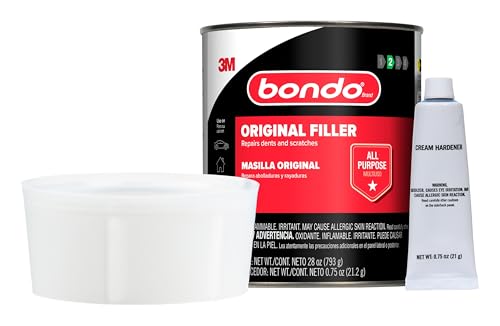



Bondo White Body Filler
Our white body filler is formulated to deliver the same trusted repair strength you expect from Bondo with enhanced visibility during application and finishing. The white base makes it easy to spot pinholes, low areas, and surface imperfections before you start sanding.
Whether you're working on automotive panels, fiberglass boat hulls, or household repairs, this two-part polyester filler spreads smoothly and cures fast. We designed it to sand easier than traditional gray formulas while maintaining the durability professionals demand.
What makes white body filler different
Formula Composition & Performance
White bondo uses a two-part polyester resin system that bonds chemically rather than mechanically. This creates a repair that becomes part of the substrate rather than sitting on top of it.
The white pigmentation comes from titanium dioxide, which doesn’t compromise strength or adhesion. We’ve tested this formula against our traditional gray filler in side-by-side comparisons — it achieves the same tensile strength while sanding 15-20% faster due to optimized filler particle size.
Surface Preparation & Application
Preparing the Repair Area
Clean the damaged area with wax and grease remover, then sand with 80-grit paper to create a feathered edge around the damage. The repair should transition gradually from bare substrate to existing finish — sharp edges telegraph through filler and cause visible lines.
Bare metal must be treated with a phosphoric acid metal prep or self-etching primer before applying white bondo. This prevents moisture from reaching the metal and causing rust to form under the repair.
Sanding & Finishing Process
Wait until the filler is fully cured before sanding. Test by scraping a corner with your fingernail — if it powders instead of gouging, it’s ready. This typically takes 20-30 minutes in warm conditions.
Start with 80-grit on a long sanding board to level the repair and reveal any low spots. The white surface makes these much easier to spot than gray filler. Apply additional thin coats as needed, letting each cure completely.
Shop More Specialty Repair Fillers


Rated 4.8 by verified buyers


Common Questions About Bondo White Body Filler
The formulas deliver identical strength and adhesion. White bondo uses titanium dioxide pigment for visibility during application and sanding, making it easier to spot surface defects before priming.
Gray filler works just as well structurally but doesn't show pinholes and low areas as clearly. Many professionals prefer white for final finish work and gray for rough structural repairs where color contrast isn't important.
No, you must prime the repair first. Body filler is porous and will absorb solvents from paint, causing poor adhesion and possible failure.
After sanding smooth with 180-grit, apply two coats of automotive primer-surfacer. Let it cure fully, then sand with 320-400 grit before applying your topcoat. The primer seals the filler and provides proper paint adhesion.
Keep individual applications under 1/4 inch thick. Thicker layers generate excessive heat during curing, which can cause cracking and pinholes.
For deeper damage, build up the repair in multiple thin coats. Let each layer cure completely before applying the next. This creates a stronger repair with fewer defects than one thick application.
Standard white bondo is too rigid for flexible plastic bumpers. The repair will crack as the bumper flexes during normal use.
For bumper covers and flexible plastics, use our dedicated flexible filler formula. It contains plasticizers that let the repair move with the substrate without cracking or delaminating.
The mixed filler changes from red-streaked to uniform pink as you spread it. As it cures, the color shifts to pale pink, then white.
When fully cured, scraping with your fingernail produces powder rather than gouges. At 77°F this takes 20-30 minutes. Sanding too early clogs your paper and leaves gummy residue; waiting too long makes sanding harder but doesn't damage the repair.
Yes, but you must remove all rust and treat bare metal first. Body filler doesn't stop rust — moisture will continue corroding underneath if you don't prep correctly.
Cut out rusted metal or grind to bare steel, then apply metal prep or self-etching primer. This creates a protective barrier between metal and filler. For rust-through damage, weld in patch panels before filling.
Use opened filler within 6 months for best results. Keep the lid sealed tight — exposure to air causes surface skinning that wastes product.
Cream hardener has a shorter shelf life than base filler. If it turns dark brown, separates into layers, or won't harden the filler properly, replace it. Store both components between 60-80°F away from direct sunlight.