


Bondo Auto Body Filler
Our original Bondo Auto Body Filler has been the go-to solution for auto body repair since 1955. This two-part polyester resin formula bonds permanently to metal, fiberglass, and wood, filling dents, dings, and rust holes with a repair that's stronger than the surrounding material.
Whether you're restoring a classic car or fixing daily driver damage, this body filler sands smooth in 15 minutes and accepts paint, primer, or additional filler coats without cracking. We engineered it for maximum adhesion and minimal shrinkage, so your repair stays flush and solid for years.
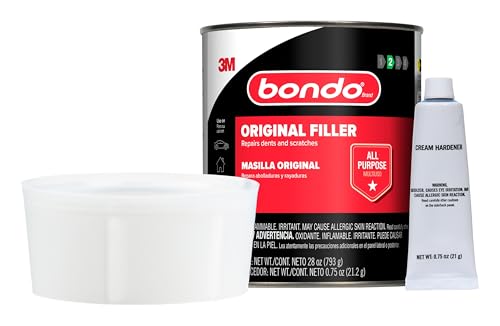
Professional body shops and weekend DIYers trust Bondo because it spreads easily, cures fast, and delivers a factory-quality finish every time. The 1-quart can includes cream hardener and mixing board to get you started immediately.
Formula & application details
Formula & Curing Properties
Bondo Auto Body Filler uses a catalyzed polyester resin system that hardens through chemical reaction, not air drying. When you mix the gray filler paste with the red cream hardener at a ratio of approximately 50:1, an exothermic curing process begins immediately.
The working time ranges from 3 to 5 minutes depending on temperature and hardener amount, giving you enough time to spread and shape the repair before it sets. Within 15 to 30 minutes at room temperature, the filler becomes sandable and ready for shaping with 36- to 80-grit sandpaper.
Surface Preparation & Application
Proper surface prep determines repair longevity. We recommend grinding or sanding the damaged area down to bare metal, extending at least one inch beyond the visible damage to create a clean bonding surface. Remove all paint, rust, and contaminants with 36- or 80-grit sandpaper.
Feather the edges of surrounding paint to create a gradual transition zone. Wipe the entire area with a degreaser or wax remover, then dry completely before mixing your filler.
Sanding & Finishing
Once the bondo auto body filler reaches a firm, tack-free state—usually 15 to 30 minutes—begin shaping with coarse 36- or 80-grit sandpaper on a sanding block or DA sander. Work the repair down until it’s flush with the surrounding panel, checking frequently with your hand to detect high or low spots.
Progress through finer grits (120, 180, 220) to smooth the surface and feather the edges into the original metal. The final sanding should leave no visible ridges or pinholes.
Complete Your Auto Body Repair Kit


Rated 4.8 by verified buyers


Questions About Bondo Auto Body Filler
Mix approximately 2 inches of cream hardener ribbon per golf-ball-sized portion of filler, which equals roughly a 50:1 ratio by volume. In warmer temperatures (above 80°F), reduce hardener slightly to extend working time. In cooler conditions (below 65°F), add slightly more to ensure proper cure.
Always mix to a uniform color with no red streaks visible. Too much hardener causes brittleness and fast setup; too little results in soft, tacky filler that won't cure properly.
No, bondo auto body filler requires bare substrate for proper adhesion. Sand or grind through all paint, primer, and rust down to clean metal, fiberglass, or wood before application.
Feather the edges of surrounding paint to create a gradual transition, but the repair area itself must be completely bare. Filler applied over paint will eventually delaminate and crack.
Apply no more than 1/4 inch thickness per layer to prevent cracking and incomplete curing. Thicker applications trap solvents inside, causing the surface to harden while the interior remains soft.
For deeper repairs, build up in multiple thin coats. Allow each layer to cure fully (30 minutes minimum), then rough-sand with 36-grit paper before applying the next coat. This method creates stronger, more durable repairs than single thick applications.
Start with coarse 36- or 80-grit sandpaper to shape the repair and bring it flush with surrounding surfaces. Progress through 120-grit, then 180-grit to smooth out scratches.
Finish with 220- to 320-grit for final feathering before primer. Use a sanding block or dual-action sander to maintain flat surfaces and avoid creating low spots. The filler sands easily but creates dust, so wear appropriate respiratory protection.
You can apply primer as soon as the filler is fully cured and sanded, typically 30 minutes to one hour after application. For best results, wait 24 hours before applying color coats to allow any residual solvents to evaporate completely.
Always apply automotive primer-surfacer over sanded bondo auto body filler before painting. The primer seals the porous filler, prevents solvent absorption, and provides uniform color holdout for topcoats.
Standard Bondo Auto Body Filler is designed for rigid substrates and will crack on flexible plastic bumpers. For plastic bumper repairs, use our Bondo Flexible Filler or similar products specifically formulated to flex with the panel.
Bondo works excellently on fiberglass, which is semi-rigid, and on hard plastics like ABS or rigid polyethylene. Test adhesion on an inconspicuous area first if you're uncertain about substrate compatibility.
Press a sheet of plastic wrap or wax paper directly onto the filler surface to exclude air, then replace the lid tightly. Store in a cool, dry location away from heat and sunlight.
Properly sealed Bondo remains usable for six months after opening. Cap the hardener tube immediately after each use to prevent skinning. If the filler develops a thick skin, strong odor, or becomes stringy, discard and replace with fresh product.