

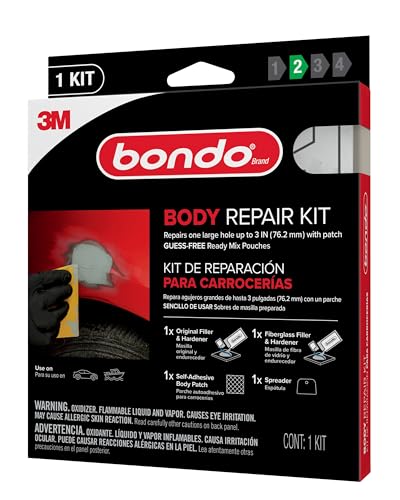


Bondo Bumper Repair Kit
Our Bondo Bumper Repair Kit delivers professional-quality bumper restoration right in your garage or driveway. Designed specifically for modern flexible plastic bumpers, this complete system repairs cracks, tears, dents, and gouges without the need for expensive body shop visits.
We've engineered this kit with a unique two-part flexible filler that moves with your bumper's natural flex, preventing future cracking. The kit includes everything you need: flexible filler compound, hardener, fiberglass reinforcement mesh, sandpaper, mixing tray, and application tools.
Whether you're fixing collision damage, parking lot scrapes, or age-related bumper deterioration, this system bonds permanently to most automotive plastics including PP, TPO, and PUR. The cured repair is ready to sand, prime, and paint in just 30 minutes.
What's included in your kit
How the Two-Part Flexible Formula Works
Unlike traditional body fillers that crack on flexible surfaces, the bondo bumper repair kit uses a proprietary flexible resin system engineered to move with modern plastic bumpers. The two-part formula combines a flexible base compound with a chemical hardener in a precise ratio.
When mixed according to our instructions, the hardener initiates a cross-linking reaction that cures the filler while maintaining elasticity. This chemistry is crucial because bumpers flex during impacts, temperature changes, and normal driving stress. A rigid filler would simply crack again within weeks.
Surface Preparation and Application Steps
Cleaning and Sanding
Proper surface preparation determines repair longevity. We recommend cleaning the damaged area with isopropyl alcohol or automotive wax remover to eliminate oils, waxes, and contaminants. Sand the repair zone and 2 inches beyond with 80-grit sandpaper to create mechanical tooth for adhesion.
Remove all loose plastic fragments and widen any cracks slightly with a rotary tool or knife edge—this allows the filler to key into the damage rather than bridging over it. For tears and holes larger than 1 inch, cut the fiberglass mesh 1 inch larger than the opening on all sides.
Sanding, Priming, and Painting Your Repair
Shaping the Repair
Once the filler cures hard to the touch (15-30 minutes depending on temperature), begin shaping with 80-grit sandpaper. We recommend a sanding block for flat areas to avoid creating low spots. Sand until the repair is flush with the surrounding bumper surface, checking frequently by running your hand across the area.
Progress to 180-grit sandpaper to remove 80-grit scratches, then finish with 320-grit for final smoothing. The repair should feel seamless when you close your eyes and run your fingers across it. Any remaining low spots can be filled with a thin skim coat of additional filler, then re-sanded.
Complete Your Auto Body Repair Toolkit


Rated 4.8 by verified buyers
Common Questions About the Bondo Bumper Repair Kit
Yes, this kit is compatible with all flexible plastic bumpers manufactured since 1990, including polypropylene (PP), thermoplastic olefin (TPO), polyurethane (PUR), and PP blends. These materials comprise over 95% of modern automotive bumpers.
To verify compatibility, check the back side of your bumper for a molded recycling symbol or material abbreviation. If your bumper flexes when pressed (rather than feeling rigid like fiberglass), this kit will bond permanently to it. The flexible resin formula is specifically engineered for these thermoplastic materials.
Most repairs take 2-4 hours including preparation, application, curing, sanding, and priming. The filler itself cures in just 15-20 minutes at room temperature and is ready to sand after 30 minutes.
Breaking down the timeline: surface prep takes 15-30 minutes, filler mixing and application takes 10-15 minutes, curing takes 20-30 minutes, sanding takes 30-60 minutes depending on repair size, and priming adds another 15-20 minutes plus drying time. Painting is additional and depends on your chosen method. You can drive the vehicle immediately after the filler cures, but we recommend waiting until after priming and painting for best appearance.
You must use a flexible bumper primer before painting—never paint directly over the cured filler. Standard automotive primer is too rigid and will crack on flexible bumper surfaces.
Flexible bumper primer (also called adhesion promoter) is specifically formulated to bond to plastic and flex with the bumper's movement. Apply 2-3 light coats, allow to dry for at least one hour, then wet-sand with 400-600 grit before applying your color-matched automotive paint. This primer step is essential for paint adhesion and long-term durability of your repair.
This kit handles cracks up to 3 inches long, holes and tears up to 3 inches across, and dents up to 1 inch deep. Within these parameters, repairs restore approximately 85-95% of original bumper strength when the included fiberglass mesh is used properly.
For larger damage—cracks over 4 inches, softball-sized holes, or areas where mounting points are broken—the filler will still bond but structural integrity may be compromised for crash safety. In those cases, consider professional assessment or bumper replacement. The 0.85 oz of filler compound provides enough material for 2-3 typical parking lot damage repairs.
Dispense a ribbon of filler about 3 inches long onto the included mixing tray. Add hardener as a thin bead along one edge of the filler—the correct ratio is approximately 2% hardener by volume, which looks like a grain-of-rice-sized amount per inch of filler.
Mix thoroughly for 30-45 seconds using the edge of your spreader until you achieve a uniform color with no streaks of unmixed hardener. Too much hardener causes the mixture to cure too fast and become brittle; too little means it won't cure completely. You have 3-4 minutes of working time after mixing, so prepare your repair area before mixing and work quickly once combined.
No—the flexible resin formula is specifically engineered to move with your bumper's natural flex without cracking. This is the key difference between this bumper-specific product and traditional rigid body fillers that would crack within weeks on a flexible surface.
The two-part chemistry creates a cured material that maintains elasticity while providing structural strength. The included fiberglass mesh adds tensile reinforcement that distributes stress across the repair. When applied correctly with mesh reinforcement on the back side, repairs remain crack-free through impacts, temperature cycling, car washes, and normal driving stress. Hundreds of thousands of successful repairs demonstrate the long-term durability of this flexible system.
The kit includes everything essential for basic repairs: filler compound, hardener, fiberglass mesh, mixing tray, spreader, and 80-grit sandpaper. However, most users find these additional items helpful: finer sandpaper grits (180, 320, 400, 600), a sanding block, isopropyl alcohol or wax remover for cleaning, painter's tape for masking, and tack cloth for dust removal.
You'll also need flexible bumper primer and color-matched automotive paint, which are not included because they're vehicle-specific. For applying the mesh to the back side of large repairs, small spring clamps or masking tape help hold it in position while the first layer cures.