
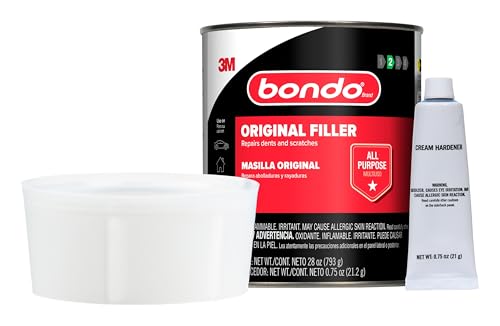


Bondo Body Filler
Our Bondo Body Filler is the trusted solution for repairing dents, rust damage, and surface imperfections on cars, trucks, and metal or fiberglass surfaces. This two-part polyester filler spreads smoothly, cures fast, and sands to a perfectly smooth finish in under 30 minutes.
Professional body shops and DIY enthusiasts rely on this formula for its superior adhesion and workability. Whether you're restoring a classic vehicle or patching a damaged panel, Bondo delivers a rock-hard repair that won't crack, peel, or shrink over time.
What makes this body filler professional-grade
Application & Mixing Instructions
Mix Bondo Body Filler with the included cream hardener using a clean mixing board and spreader. Use a golf-ball-sized amount of filler with a 1-inch ribbon of hardener for most repairs — red streaks disappear when the mixture is fully blended.
Apply the mixed filler immediately using firm, overlapping strokes to ensure proper adhesion and eliminate air pockets. Work the material into surface imperfections and slightly overfill the damaged area to allow for sanding. For deeper repairs, apply multiple thin layers rather than one thick coat.
Surface Preparation & Compatibility
Preparing Metal Surfaces
Clean all surfaces thoroughly to remove dirt, oil, rust, and loose paint before applying bondo body filler. Use 80-grit sandpaper or a wire brush to feather edges around the damaged area and create a mechanical bond for the filler. Bare metal provides the strongest adhesion — avoid applying over paint whenever possible.
Treat rust spots with a rust converter or grind to clean metal before filling. The polyester formula bonds permanently to properly prepared steel, aluminum, and galvanized metal without primers or promoters.
Sanding & Finishing Techniques
Start sanding as soon as the filler becomes firm but before it fully hardens — this “green stage” cuts faster and produces less dust. Use 80-grit paper on a sanding block to knock down high spots and shape the repair to match surrounding contours.
Progress through 120-grit, 180-grit, and 220-grit sandpaper to refine the surface. The filler feathers smoothly without edge cracking or pinholes when sanded correctly. Check your work frequently by running your hand across the repair — you shouldn’t feel any ridges or low spots.
Complete Your Auto Body Repair Kit


Rated 4.8 by verified buyers


Common Questions About Bondo Body Filler
Use approximately a 1-inch ribbon of cream hardener for each golf-ball-sized amount of bondo body filler. Too little hardener causes slow or incomplete curing, while too much accelerates set time and may cause cracking.
Mix thoroughly until all red streaks disappear and the color is uniform. The mixture remains workable for 3-5 minutes at 77°F before it begins to harden. Warmer temperatures shorten working time, while cooler conditions extend it slightly.
Bondo body filler adheres best to bare, sanded metal or fiberglass. You can apply over existing paint if you sand it thoroughly with 80-grit paper to create a rough surface, but adhesion is strongest on clean, unpainted material.
Remove loose or flaking paint completely before application. The filler bonds mechanically to the surface texture, so proper preparation determines repair longevity. For best results, grind or sand to bare substrate around all damage areas.
Bondo body filler becomes tack-free in 15 minutes and reaches initial cure in 20-30 minutes at room temperature (77°F). You can begin sanding as soon as the surface feels firm to the touch.
Full chemical cure occurs within 60 minutes under normal conditions. Lower temperatures and high humidity extend cure times, while heat accelerates hardening. The filler changes from pink to tan as it cures, providing a visual indicator of readiness.
Apply bondo body filler no thicker than ¼ inch per layer for proper curing and strength. Thicker applications generate excessive heat during the chemical reaction and may remain soft in the center or develop cracks.
For deeper repairs, apply multiple thin layers with full cure time between coats. Sand each layer lightly before applying the next to improve adhesion. This layering technique produces stronger, more durable repairs than single thick applications.
Yes, always apply automotive primer over sanded bondo body filler before topcoat paint. The filler is porous and will absorb paint unevenly without a primer barrier, causing discoloration and poor finish quality.
Sand the cured filler smooth through 220-grit, then wipe clean with a tack cloth. Apply 2-3 coats of quality automotive primer, allowing proper flash time between coats. Sand the primed surface with 320-400 grit before applying paint for the smoothest finish.
Standard bondo body filler is not recommended for flexible plastic bumpers. The rigid polyester formula will crack when the bumper flexes during normal use.
Use specialized flexible bumper repair products designed for thermoplastic materials instead. Bondo works excellently on rigid fiberglass, SMC (sheet molded compound), and metal panels but requires flexibility that the standard formula doesn't provide for modern plastic bumper covers.
Remove uncured bondo body filler immediately with lacquer thinner or acetone before it hardens. Once cured, the filler must be ground or sanded off mechanically — chemical strippers won't dissolve the polyester resin.
Use 36-grit or 40-grit sandpaper on a dual-action sander to remove large amounts quickly, then progress to finer grits to smooth the surface. A carbide rasp also works for aggressive material removal on thick applications. Always wear appropriate dust protection when sanding cured filler.